The Proven Platter – El Salvador, August 2018
Hello Diners!
This month we are arm chair traveling to El Salvador. Right off the bat I knew what I wanted to make—Pupusas! I’ve had them many times from the local pupuseria, but I’ve never made them myself. I got busy doing some research on how to make them and also found a great tutorial on YouTube to share with you.
Pupusas are found everywhere throughout El Salvador. They originated there and now are found in neighboring countries as well. A pupusa is made with masa dough, pressed into a disc, and then stuffed with a filling, typically bean and cheese, pork, or chicken.
They aren’t too difficult to master. I think the trickiest part is getting the dough just right. Too dry, and the dough will crack and be difficult to work with. Too wet, and the dough will fall apart in your hands. If the dough is too dry, add water. Too wet, just add more maseca. It’s a pretty simple fix if you’ve gone too far in either direction.
After you’ve made a few you’ll figure out your own rhythm and style. It may not be the way you’ve seen them made in the video, but it will be the way that works for you! I can honestly say that after I’ve completed my first attempt at making pupusas I would definitely make them again.
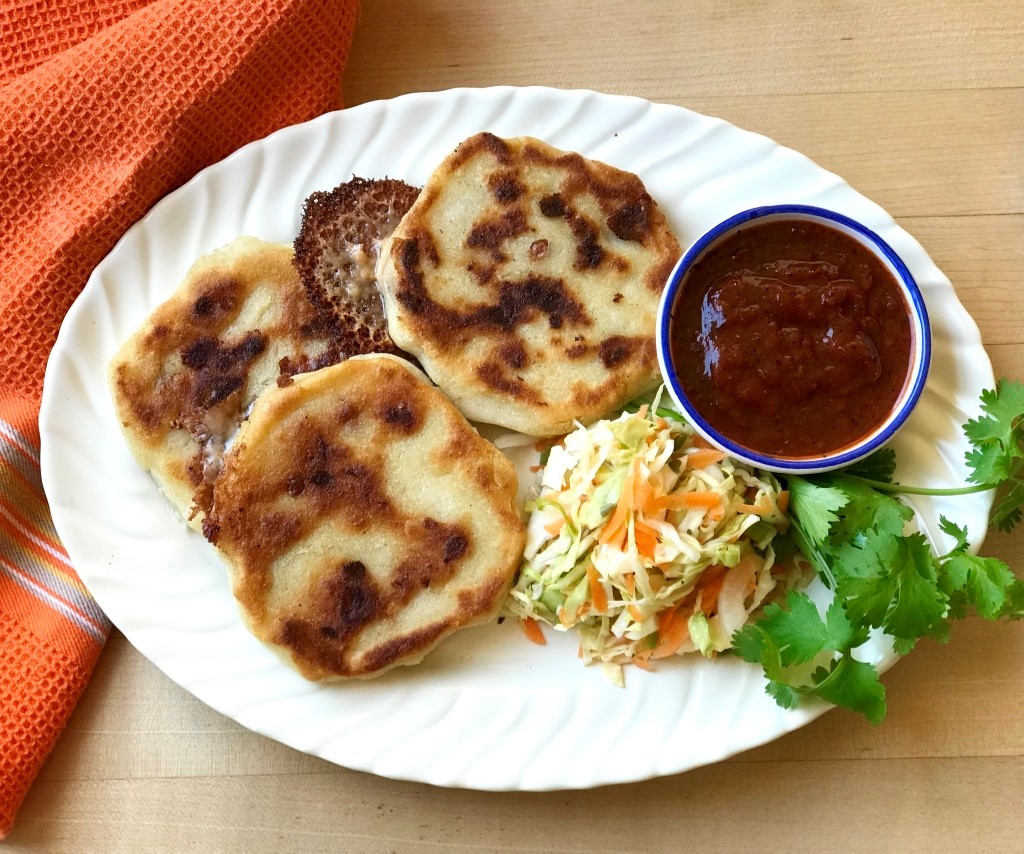
Pupusas are always served with “curtido,” a vinegared cabbage slaw, and “salsa roja,” on the side. You wouldn’t eat a hotdog without ketchup and mustard, neither should you eat a pupusa without these standard accompaniments! I’ve included recipes for both of these in the recipe line-up this month as well.
Please feel free to contact me if you have any questions or comments about the recipes, I love to hear from you! You can reach me at nw4@togetherwomenrise.org
Pupusas with Curtido and Salsa Roja
Makes about 13
Pupusas are made from little balls of masa dough that are flattened and stuffed with a filling. Most recipes call for “Maseca,” which is an instant corn masa flour. Some recipes call for “masa harina,” which is basically the same thing. But I was confused, and did a little research, and came away more confused. I think that Maseca is the brand name for masa harina, and it is referred to on the front of the bag in big letters as Maseca, instant corn masa flour. If you can get ahold of Maseca, use it. If not, use masa harina, and your results should be about the same. If anyone has any more information to share about this, I’d welcome your comments.
I decided to go with a bean and cheese filling for this, although chicken, and especially pork, are traditional fillings as well. For convenience, I used canned beans. My very favorite brand is S&W Chili Beans, labeled as “pinto beans, chili peppers, onion and garlic in a zesty tomato sauce.” They are so, so good! For this recipe, you’ll want to drain the excess sauce from the beans, but don’t rinse the deliciousness off. For other types of beans you could use to make this, such as pinto or black beans, drain and rinse.
While I’ve tried to describe as best as I can the method for making pupusas, you’ll want to take a look at how to make pupusas on YouTube, by Gochujang Mama. She makes it look easy, and the visuals will help you understand exactly what I’m talking about in the recipe body. Her video is a little lengthy, but the important parts are from the beginning through the 6-minute mark, where she shows you how to make and form them, and then starting after the 10-minute mark where she demonstrates how to cook them and what to look for. Another very short video here lasts about a minute and shows you how to make them start to finish.
You can also completely assemble your pupusas one day ahead of time and wrap well in plastic wrap. Bring them out of the fridge about 30 minutes before you plan to cook them, so they can warm up a bit.
Ingredients
2 ½ cups Maseca
1 tsp. kosher salt
1 ¾ to 2 cups warm water
For the filling
1 (15 oz.) can of beans, drained
1 heaping cup of grated mozzarella
Directions
For the dough
Begin by placing the masa and the salt into a mixing bowl. Stir to incorporate the salt. Add most of the water and mix with your hands. Knead this for a few minutes, adding a bit more water if it seems too dry, squishing the dough between your fingers until thoroughly mixed. The masa should feel like soft playdough.
Measure out the masa into 13 balls, and place back into the bowl covered by a wet paper towel. If you have a scale measure the balls into 2-ounce portions.
For the filling
Put the beans and the grated cheese into a mixing bowl. Using your hands, mash everything all together until the mixture begins to stick together and form a ball. Divide the filling into 13 balls, about 1 ounce apiece. Now you’re ready to assemble your pupusas.
Set up
Set up a wide shallow bowl near your assembly station with some water in it and a tablespoon of oil. You will use this bowl to dip your hands into whenever you need to moisten the dough or keep the dough from sticking to your hands. I basically did this every time I picked up a new ball of dough.
Also have nearby a baking sheet. Coat the bottom with a light layer of oil to stack your pupusas on. When you’ve covered the sheet pan with one layer of pupusas, cover with plastic wrap and proceed with making the rest, placing them on top of the plastic wrap.
Assembly
Take a ball of dough, and using your fingers begin to flatten the ball into a circle. Press and play “pat-a-cake” with the dough until it is about the size of your palm. Grab a ball of filling and place it into the middle of the dough (still in your hand). Gently cup and twirl the dough around the filling until the filling is covered.
You now have a ball of dough with the filling in the middle. The next step is to gently flatten the dough until it is the size of your palm again, about the size of a small corn tortilla. Gently press, and once again play pat-a-cake with the dough. I found that the middle of the cake tends to get quite thin, and I remedied this by pinching over some excess masa from the edges of the cake to cover any holes.
Place the pupusa on the prepared baking sheet and continue until all the dough balls are complete. At this point you can cover with plastic wrap, store in the fridge, and cook them the next day. Note: don’t make the filling ahead of time. I did that, not by design, but because I didn’t have time to make the pupusas once I had the filling made. When I took out the filling the next day it was too cold to press into the dough, and I had to break it up and let it warm up.
Now it’s time to cook! I used a 12-inch heavy frying pan, but in the video a griddle was used; an electric frying pan would work as well. I found that I was able to make 4 at a time in my 12-inch skillet.
Heat the pan to medium, and coat with a very thin layer of oil. (In the video they don’t use oil, but I preferred it with oil.) Place the pupusas in the pan, and let them cook, undisturbed, for 3 to 4 minutes. (Note: in the video she says to cook them for almost 10 minutes on one side before turning them. I found that it only took me about 4 minutes for the first side, and 3 minutes on the second side to have them fully cook.) Check to see that they are not burning, obviously turn the heat down if that is the case. You want to have the heat such that they become golden brown on one side, with a little bit of steam, or perhaps a small bubble of filling coming off the top, then you’ll know it’s ready to turn. Flip the pupusa and cook for another 3 to 4 minutes. Remove to a platter placed in a warm oven while you prepare the rest of them.
Serve the pupusas with curtido (cabbage slaw) and salsa roja.
Recipe and photo credit: Linda McElroy